Professional Wallpaper Removal vs. DIY: Hidden Costs, Wall Damage, and Timelines
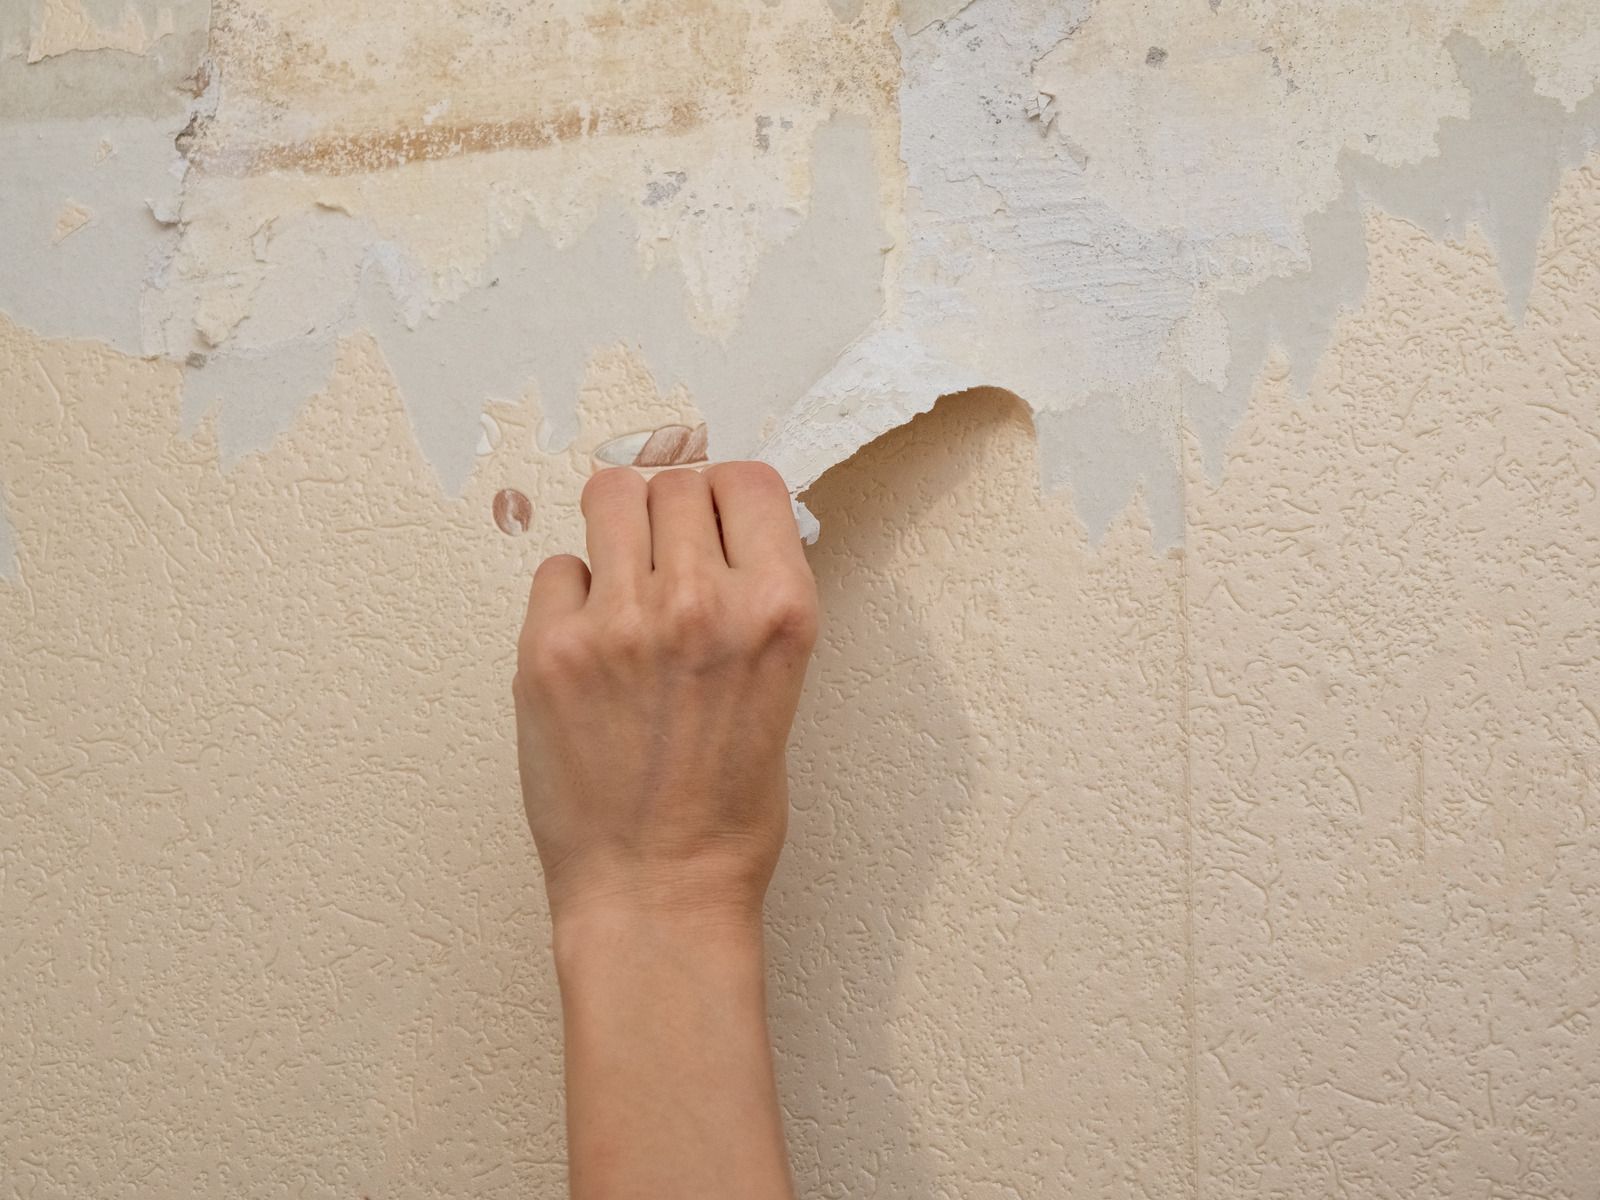
The steam scorched through the seam before the paper even had a chance to loosen. You have been at it for three hours, a pile of soggy strips on the floor, and the wall underneath looks like something dragged its fingernails across it. What started as a weekend refresh has turned into a plaster repair job that was nowhere in the original plan.
Wallpaper removal is one of the most underestimated surface preparation tasks in residential painting. Homeowners who have never dealt with older construction or multiple layers frequently misjudge both the timeline and the wall condition they will end up with once the paper is gone. Getting it right means knowing what is actually behind that wallpaper, how the substrate will react to moisture, and what the wall will need before a single drop of paint touches it.
What Makes Wallpaper Removal Harder Than It Looks
The difficulty almost always comes down to two things: how the wallpaper was installed and what is underneath it.
In homes built before the mid-1980s, wallpaper was commonly applied directly to unprepared drywall or over plaster that was never primed before installation. When moisture from a steamer or removal solution soaks into that paper, it does not stop at the face. It travels through the adhesive and into the wall surface below, softening drywall paper, causing plaster to crack, and pulling the surface apart in chunks. On a single wall, this can add 4 to 6 hours of patching work that was never budgeted.
Newer construction tends to use primed drywall, which holds up better. But even then, if the previous installer did not use a liner or sizing coat, the adhesive bonds directly to the drywall face paper. Dry stripping in that situation removes the drywall paper along with the wallpaper, leaving a rough substrate that has to be skim coated before painting.
Multiple layers are a separate problem entirely. A wall with two or three generations of wallpaper, which is common in Hudson Valley homes that have not been fully renovated in decades, can take two to three times longer to strip than a single layer, regardless of method.
The adhesive type matters as much as the paper itself. Older wheat paste adhesives respond well to water and release with patience. Vinyl adhesive, used widely since the 1990s, does not absorb moisture easily and often requires chemical strippers applied in stages.
WARNING: If you are working with walls that have plaster over wood lath, soaking the wall with a steamer can cause the plaster to separate from the lath keys. This is a structural integrity issue, not a cosmetic one. A wall in that condition can fail in sections. If you feel the plaster flex or hear a hollow sound when you knock on it, stop and get a professional assessment before continuing.
DIY Removal: What the Process Actually Costs You
The appeal is obvious. Rental steamers run about 40 to 60 per day, scoring tools are inexpensive, and fabric softener solutions cost almost nothing. On paper, a DIY job looks like a 100 to 150 project.
The real accounting looks different once you include:
Time. A single average bedroom wall takes a skilled professional 2 to 3 hours to strip, clean, and prep. A homeowner doing it for the first time typically spends 6 to 10 hours on the same wall, assuming no significant substrate damage.
Repair materials. Joint compound, mesh tape, sandpaper, and primer add up quickly, and using the wrong product for the surface type often means redoing the repair entirely.
Primer. After any wallpaper removal, the wall requires an oil based or shellac based primer before paint. Latex primers applied over bare drywall after moisture exposure raise the paper grain and cause adhesion failures within 6 to 12 months.
Damage costs. If removal tears the drywall face paper or damages plaster, repair depends on severity, easily exceeding any savings from skipping professional removal.
TIP: Before you wet a single section of wall, score a small inconspicuous area and try dry stripping. If the paper peels in full sheets without tearing the surface, you have a good installation to work with. If it shreds and takes the wall surface with it, stop and assess the entire wall before proceeding with moisture.
How Professionals Approach the Same Job
On service calls we walk the wall surface first, check for hollow spots in the plaster, identify layer count by peeling back a corner, and test the substrate response to a small amount of water in an inconspicuous area. That 10 minute evaluation changes the entire approach.
A wall with loose plaster behind vinyl wallpaper gets treated completely differently than a well primed drywall surface with single layer paper. We use commercial grade steamers for stubborn installations and enzyme based stripping solutions for vinyl adhesive that does not release with moisture alone. After stripping, walls are cleaned of adhesive residue, dried fully, repaired at the substrate level, and primed with the correct product before any paint is applied. Skipping any of those steps is what causes the adhesive ghosting and sheen inconsistency we frequently see on DIY removal projects.
Getting the Wall Ready for Paint After Removal
Removal is only the beginning. A wall that has been stripped is not a wall that is ready to paint.
After stripping, the wall surface should be washed down with a clean sponge and warm water to remove all adhesive residue. Adhesive left behind causes paint to fish-eye, peel, and absorb unevenly. Allow the wall to dry for a full 24 hours minimum before any repairs are made.
Repairs should use setting type joint compound for deeper damage and lightweight compound for skim coating and smoothing. Sand with 120 grit before priming, not after.
Primer selection is the most commonly skipped step in DIY preparation. An oil based primer seals the repaired areas, locks down any remaining adhesive residue, and prevents the drywall face paper from raising when the finish coat is applied. This step is not optional. A latex paint applied over an unprimed stripped wall will almost always show adhesive ghosting, uneven sheen, and premature peeling within one to two seasons.
Check walls in high humidity rooms every few months for paint lifting or adhesive bleed-through. Before any painting project in an older home, confirm whether wallpaper was previously installed and factor removal and prep time into your timeline.
Professional Wallpaper Removal Starting With an Honest Wall Assessment
At Jerry's Refinishing, we have been handling
wallpaper removal
and full surface preparation for homeowners across New Windsor, New York for 30
years. New Windsor homes, with their mix of plaster construction and older adhesive applications, require a different approach than what most general painting advice covers. We assess every wall before quoting so you know exactly what the surface condition is before work begins. Call us to schedule a walkthrough before your next painting project.
Frequently Asked Questions
How long does professional wallpaper removal take compared to DIY?
A professional crew strips, cleans, and preps an average room in one full day. A first-time DIYer typically takes two to three days across a weekend. The difference is experience with adhesive types, proper equipment, and knowing what substrate condition to expect before starting.
Will removing old wallpaper damage my walls?
It depends on the original installation. If the wall was primed before the paper went up, damage is minimal with proper technique. If paper was applied to bare drywall or raw plaster, some surface damage is expected and corrected through patching and priming before paint.
Can I paint directly over wallpaper instead of removing it?
Painting over wallpaper is not recommended. Seams and texture telegraph through most finishes, and moisture from paint causes bubbling mid-job. If the paper ever fails after painting, the entire wall needs stripping and repainting. Removing the paper first produces a surface that holds paint correctly long term.
Why does paint peel after wallpaper removal?
Peeling almost always comes from adhesive residue left on the wall or using the wrong primer. Residue prevents bonding, and latex primer applied over bare drywall after moisture exposure raises the paper grain. An oil based primer applied after the wall fully dries solves both problems consistently.
Is wallpaper removal worth doing professionally in older homes?
In homes built before 1980, yes. Direct application to unprimed plaster and hardened adhesives creates conditions where DIY removal frequently damages the wall more than it saves in labor cost. Repair work required to correct that damage typically exceeds the original removal cost in older construction.